Wednesday, July 24, 2013

theBalm InStain Blushes - Review and Swatches

  Disclaimer: All products were purchased by me, and all opinions are my own.

I have been back home for over a week now, and I still don't want to do much of anything. I have spent a lot of time reading and a lot of time sleeping. Oh yeah...I also watched the Syfy movie Sharknado last night with a friend. It was so horrifically awful that it was amazing. I hadn't laughed so hard in a long time.

In the meantime, my blog has been mocking me with my lack of motivation. I have a bunch of pictures downloaded onto my computer - some have been edited, some haven't - and a pile of products in my new product bin. Getting caught up isn't really an option at this point, but making progress is.

This is one of those reviews that has been waiting around for a while. It's another purchase I made during theBalm's 50% off everything sale. I wanted to pick up the entire collection of InStain blushes, but I restrained myself and only picked up two of them.Their regular retail price is $22, so I ended up paying $11 each for mine.

Packaging 

theBalm InStain blush in Argyle
theBalm InStain blush in Toile

theBalm always seems to do a fantastic job with their packaging. It's cute and quirky. The exterior of the packaging looks like a magazine from the 1920s. The interior design around the blush pan matches the name of the blush color. The Argyle blush has an argyle pattern surrounding it; the Toile blush has a toile pattern surrounding it. The packaging itself is a sturdy cardboard with a magnetic closure.

Product

theBalm InStain blush in Argyle
Argyle is a much brighter pink than my pictures (and the pictures on theBalm's website) show. It's a slightly warm, hot pink shade that is completely matte.

theBalm InStain blush in Toile
 Toile is also brighter than my pictures show. It is a matte, coral pink shade.

Both blushes are highly pigmented. Do they stain? Sort of. With the swatches on my arm, I could get a little bit to come off with a dry towel. I could get even more off with just water. However, in order to completely get rid of the swatches, I had to use soap and water. On my cheeks, they last on my and look fresh ALL day. The one downside that I've noticed with these is their "staining" aspect makes then a little challenging to blend. It's practically impossible for me to NOT over-apply blush, and I rely on a kabuki brush to blend them out after I apply them. These blushes don't want to blend out as easily as other blushes in my collection.

Final Thoughts 

These are really good quality blushes. If you have trouble with getting blushes to stay, they are definitely worth checking out. There are 6 shades in the collection, and the shades have a broad enough range that there should be a shade that appeals to everyone. I'm happy to have Argyle and Toile in my collection. I may or may not pick up any more in the future. If you are thinking about picking these up, I would suggest waiting until theBalm goes on sale on Hautelook. I haven't seen the InStain blushes show up on there, but since most of theBalm's regular line goes on sale there regularly, I can see them listing these blushes there as well.

Have you tried theBalm's InStain blushes? Do you have the tendency to over-apply blushes like me?

Disclaimer: All products were purchased by me, and all opinions are my own.

Friday, July 19, 2013

My Minimal Makeup Look

Disclaimer: All of the products mentioned in this post were purchased by me. All opinions are my own. 

Well...the summer school I was teaching ended on July 3, and I had big plans for getting a lot of things done at home and getting caught up on blog posts. Sadly, plans changed.

My mom let me know that Friday that my brother was back in the hospital for an issue that he's been having regularly for months. On Saturday morning she asked me to come home to help out because she's not getting around very well because of a broken ankle. I was happy that she was willing to ask for help (it's hard for her to do), and was glad to help out.

However, my trip home ended up up lasting over a week, and most of it was spent sitting in two different hospitals. I didn't really care about looking good, but I also didn't want to look awful either. It gave me the idea to share with all of you my bare minimum when it comes to makeup. These were the only products I used for most of my trip home:


Clearly, concealer is important to me.

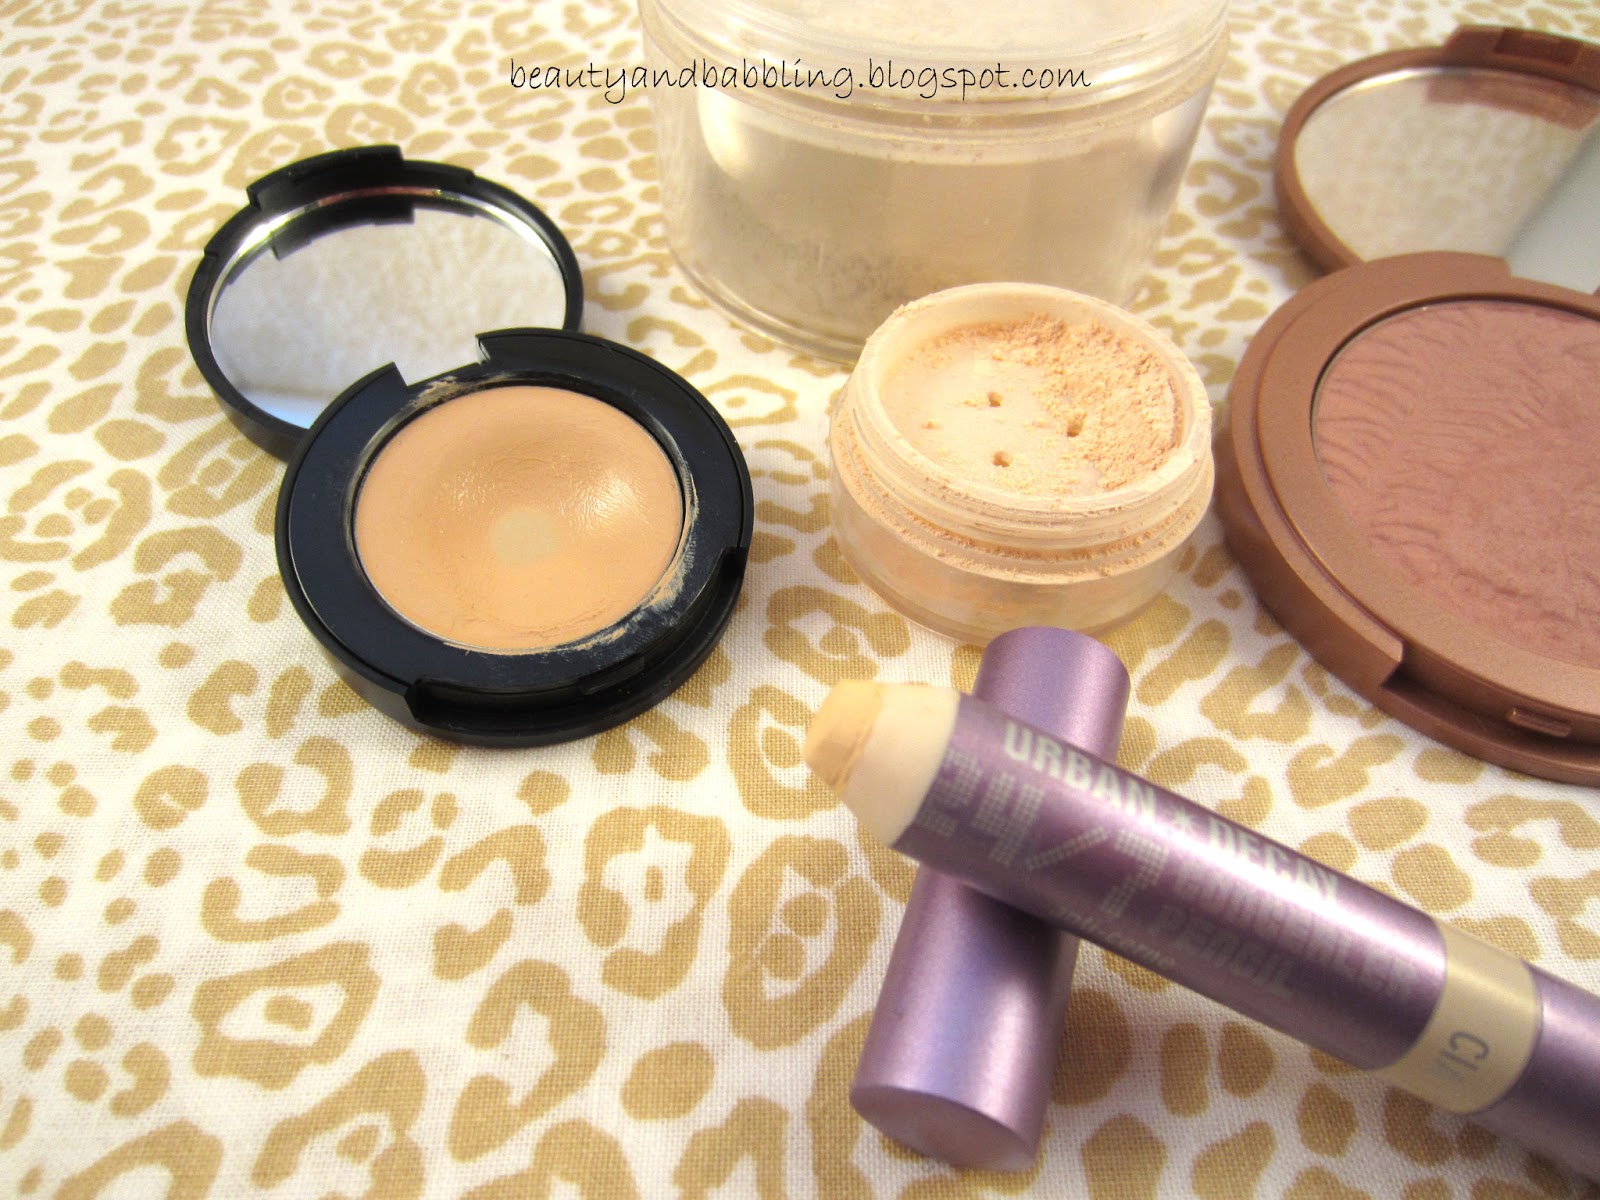
bareMinerals Correcting Concealer SPF 20 in Light 1 ($20) - I've got several correcting concealers in my collection, but this is the one I chose to bring with me. I really like the light, almost gel-like texture. I have used a brush for it, but lately, I've just been using my fingers to slick it on. As you can see, I just hit pan, and I will probably end up repurchasing it when I finish it off.

Silk Naturals Sleep in a Jar Light Peach ($6.50) - I consider this a holy grail item. I've gone through several jars. I applied this after all of the other products except my blush. It acts as my last defense against my dark circles.

Urban Decay 24/7 Concealer Pencil in CIA ($19) - If you are familiar with Urban Decay products, you might notice that this is the old formula. I bought it when it was on clearance. I have really been loving the ease of this concealer lately. It is creamy and has pretty good coverage. The pencil style makes it easy to dab it on where I want it. This is another product that I'll probably repurchase after I finish the one I have.

Meow Pampered Puss Foundation in Inquisitive Siamese ($25.95) - The price of this mineral foundation might seem a little bit high, but I want to point out that the size of this jar is HUGE. It's an 85g jar with approximately 22-30g of product, so it will last a really long time. If you aren't familiar with Meow Cosmetics, they have an impressive selection of mineral foundations. They have three different formulas with 86 shades. I used this for a long time as my everyday foundation. Since my particular formulation has lighter coverage, I also regularly use it as setting powder with a liquid foundation.


Tarte Amazonian Clay 12-Hour Blush in Exposed ($26) - These blushes are another favorite of mine. I chose to take this particular shade with me because it is such an easy, natural-looking shade to use. I didn't have to think about it too much when I was getting ready to run out the door.

That was my look. I know a lot of you are probably gasping that I didn't use mascara. I know that's an everyday thing for most women. I personally think mascara looks strange on me if I don't do any other eye makeup. I should also point out that there was always a lip balm in my pocket. I never go anywhere without a lip balm.

In case you were wondering, my brother is doing better and is back at home. They did a different procedure that should help him manage his issue better. 

When you are in a huge rush, what products are must-have items for you?

Disclaimer: All of the products mentioned in this post were purchased by me. All opinions are my own.

Saturday, June 29, 2013

theBalm Balm Jovi Palette - Review and Swatches

Disclaimer: All products mentioned in this post were purchased by me. All opinions are my own. I used my Hautelook invite link in this post.

Everyone else seems to be doing it, so here's my reminder that Google Reader is going away after this weekend. If you want to make sure you still see my new posts, which should start going up more regularly again, I highly suggest following me on Bloglovin'. It's a simple site to use. I'm also loving a new feature on Bloglovin' that allows you to mark posts as favorites. I know I'm going to use that feature a lot to check back on posts because I want to see if my comment was responded to or if I'm interested in the conversation going on in the comments.

Now that I got that out of the way, on to the review!

I'm a child of the 80's, so I grew up with Bon Jovi. Then I had one of my first experiences feeling old when I was in college. Bon Jovi had released their album Crush with the hit single "It's My Life." One of my friends was in WalMart and overheard some younger kids talking about Bon Jovi saying, "That Bon Jovi band is pretty good. They're going to make it big." D'oh!

With my affection for 80's hair bands, and Bon Jovi in particular, I was immediately drawn to the cute concept of the Balm Jovi palette. I resisted for a while but caved when theBalm had their 50% off sale. The full price for the palette is $39.50, so I got it for $19.75. The nice thing is that theBalm shows up on the website Hautelook (affiliate link) frequently, and their permanent products are marked down around 50% on there as well, so it's not too difficult to get a really good deal on this palette (or any of their other palettes).

Packaging

 
theBalm always has fantastic packaging. They are creative with it, but they don't make their packaging bulky.

One of the best packaging features for this palette is the divide that you can see about 3/4 of the way down the palette. Why is that a good feature? The top flap covers the powder products, and the bottom flap covers the cream products in the palette. This means that you don't have to worry about powder getting into the cream products. Love it! I hate when palettes combine powder and cream products because it creates a huge mess.


Another nice packaging feature is the mirror on the inside. It isn't a great mirror, but it would work in a pinch. Besides, they integrated it into the design so well that it's super cute.


The flap that covers the cream products has four suggested looks formatted to look like a Top 20 hits list, which is cute and helpful if you aren't sure how to combine the colors in the palette on your own.

Product

 
This palette includes 12 eye shadows, a highlighter, and a blush (and the two cream lip/cheek products that aren't pictured here but will be pictured later). The eye shadows are divided into three color groups: Heavy Metal, Classical, and Alternative.

Heavy Metal Shades:
From left to right: Metal-ica, Iron Maid-in, Lead Zeppelin, and Alice Copper
Metal-ica is a classic silver shade, and Iron Maid-in is a soft gold shade. I think I've used Iron Maid-in the most out of the all the shades in this palette. It's a great, easy lid shade.

Lead Zeppelin
My camera has a bad habit of dulling down shimmer and complexity in shadows. If anyone has any tips to help with that, I'd love to know. Here's a better shot of Lead Zeppelin to show that it does has shimmer in it. There's muti-colored shimmer, but most if the shimmers are gold like the ones you can see in this picture. The base shade is a dark forest green.

Alice Copper
Alice Copper is a burgundy purple shade with silver shimmers, that didn't even show up well in this picture. There is less shimmer in this shade than there is in Lead Zeppelin.

Classical Shades:
From left to right: Adagio, Allegro, Moderato, Presto
The classical shades are all matte shades, which is great. Adagio is a classic matte cream shade. It's a little too dark for my vampire-fair skin, but for most people, it will be a perfect highlight shades. Allegro is a great mid-tone brown that leans slightly warm. These types of shades are my favorite for the crease. Moderato is a deep purple, and Presto is a dark chocolate brown.

Alternative Shades:
From left to right: Blink 1982, The Stroke, rem, and Third Eye Blinded
Blink 1982 is a dusty light purple shade with subtle shimmer. The Stroke is a deep navy blue with blue shimmer. rem is a light lilac shade with a gold sheen, and Third Eye Blinded is a dusty soft pink shade.


Here's a picture that shows the shimmer in The Stroke a little bit better.


Another picture to show the gold sheen of rem. Sadly, even though this shade swatches really nicely, when I tried using it on my lids, it applied really patchy, and it was hard to work with.

Highlighter and Blush

Left to right: Solid Gold and Don't You Want Me?
Solid Gold
Solid Gold is a standard gold highlight shade that is almost identical to theBalm's Mary Lou-manizer highlighter. Don't you want me a a standard peachy-pink shade that is matte.

Lip and Cheek Colors:


Left to right: Milly and Vanilly
Milly is a dusty rose shade, and Vanilly is a sheer red. 

I've never been a huge fan of cream lip products in palettes. There's the mess issue when they are in the same palette as powder products (thanks for solving that one theBalm!). There's also the convenience factor. I don't want to take a big palette with me to touch up a lip color. Because of that, I like that these cream products can be used on the lips or the cheeks. I haven't used them much yet. I think I've tried both once on the lips, and I used Milly on my cheeks one day (I applied it with a stippling brush). It was actually a nice cheek color that seemed to last pretty well. I wouldn't consider these a selling point for the palette, but they aren't a detractor from it either.

Final Thoughts 

Overall, this is a really nice palette. It's got a great mix of shades and finishes. theBalm's powder products are good quality, and the cream products in this palette are decent and are stashed in their own section, so they don't make the entire palette look like a mess. Since it is somewhat regularly available on Hautelook for around $20, it's a great steal.

Will you be picking this up the next time it goes on sale? What are your favorite products from theBalm?

Disclaimer: All products mentioned in this post were purchased by me. All opinions are my own. I used my Hautelook invite link in this post.

Saturday, June 22, 2013

Luxury Lane Soap Triple Care Hemp Body Wash and Whipped Up Sugar Scrub - Review

Disclaimer: The products mentioned in this post were purchased by me. I am not being sponsored for this post and all opinions are my own.

I've been slacking. I still haven't gotten to replying to comments. I have a ton of pictures to edit and a lot of posts that I want to write. Sadly, I've been really busy teaching summer school and too tired when I've been home to do much of anything. Summer school is done soon though, so that should help.

I figured I'd go ahead and do a quick review post today about two of my new favorite shower/bath products.

A while ago, I did a haul post and showed the products I received for being part of the Luxury Lane Soap Test Team. I used the 15% off coupon included in the box to purchase a few items.

Triple Care Hemp Body Wash in Vanilla Oak - $9.95 for 8 fl oz


I love this body wash! It lathers really well, and the lather sticks around long enough for me to wash and shave with it. I also love the Vanilla Oak scent (there are currently 18 scents available on the website). It's vanilla, but it isn't super sweet. I would also suggest the Blackberry Tea scent, which I have in a couple other products. According to the website, it is thinner in consistency than most body washes because there are no "chemical thickeners, filler, or silicones," so I was expecting it to be watery like the Dr. Bronner's soap, but it isn't. It's thick enough that it sticks to the top of my loofah until I lather it in.

Whipped Up Sugar Scrub in Dark Kiss - $7.99 for 6 oz


Again, I absolutely love this product! It combines the Luxury Lane Soap whipped soap with raw organic sugar to make an excellent scrub. I love that it's so thick because the sugar stays evenly distributed, and I'm not let with a few grains of sugar and a bunch of oil at the end of the jar. I also don't lose half the the scrub just trying to get it from the jar to my body. It's not super scrubby, so if you are looking for an intensive scrub, this isn't it. However, it is nicely moisturizing, so it would probably be really good for dry skin.

Additional Information and Final Thoughts

Kylee Lane, the owner of the company, clearly takes pride in all aspects of it, from the jars and labels to the way things are shipped. Everything looks professional (and in some cases nicer than professional). The prices are reasonable and compare with prices at places like Bath & Body Works, and shipping isn't terrible ($5.95 flat rate shipping with free shipping on orders over $75). So far, I have really enjoyed the things I have tried, and I will happily continue to purchase from this company.

Have you tried Luxury Lane Soap products? What are your favorite indie bath and body companies?

Thursday, May 30, 2013

Pressing Mineral Eye Shadows - Part II

Disclaimer: There is nothing to report.

I'm finally back with Part II to actually show you how to press your mineral eye shadows. If you missed Part I, you can find it here. Also please don't forget to enter my giveaway!

My information is a combination of information I've picked up on the internet. One of my favorite videos on how to press was made my a friend of mine from Mineral Makeup Forum (it's a private board, so you have to register to view the whole thing). Her name is Oxana, and you can find her video about pressing shadows here (she also has a blog that you can find here). I also made sure to read TKBTrading's information about pressing shadows that came with their starter kit.

Let's get started pressing!

The first thing to do is gather all of your materials and get your pressing station set up. This can be a messy and time-consuming process, so plan accordingly. I like to cover my work area with paper towels because it makes cleanup that much easier when I'm done.

The first thing I do is lay out several pans and spray them down with alcohol to sanitize them before I start, and I let them dry (it doesn't take long).

Side note: Please excuse the picture quality. Since I wasn't using my normal setup, the colors are really off. I didn't feel the need to try and retake them since I'm not trying to show the colors, just the process.


 After the pans I dry, I take one and place a drop of MyMix on the bottom of the pan and spread it around with a cotton swab. I believe this step is done to help the shadow stick to the bottom of the pan.

MyMix in shadow - about 4 drops
The next step is to open up your mineral shadow and add the MyMix (or your choice of mixing medium). I typically use about 4 drops for a 5g jar of shadow. That being said, this is the trickiest part of the process. If you use too much MyMix, your eye shadow will be too hard and won't have any color payoff, and there is also no way to remove MyMix once it is in the shadow. When in doubt, use less. If your shadow ends up too powdery, you can always remix it with more MyMix and repress it. It is also important to note that matte shadows require a lot less MyMix.

Shadow with MyMix and rubbing alcohol
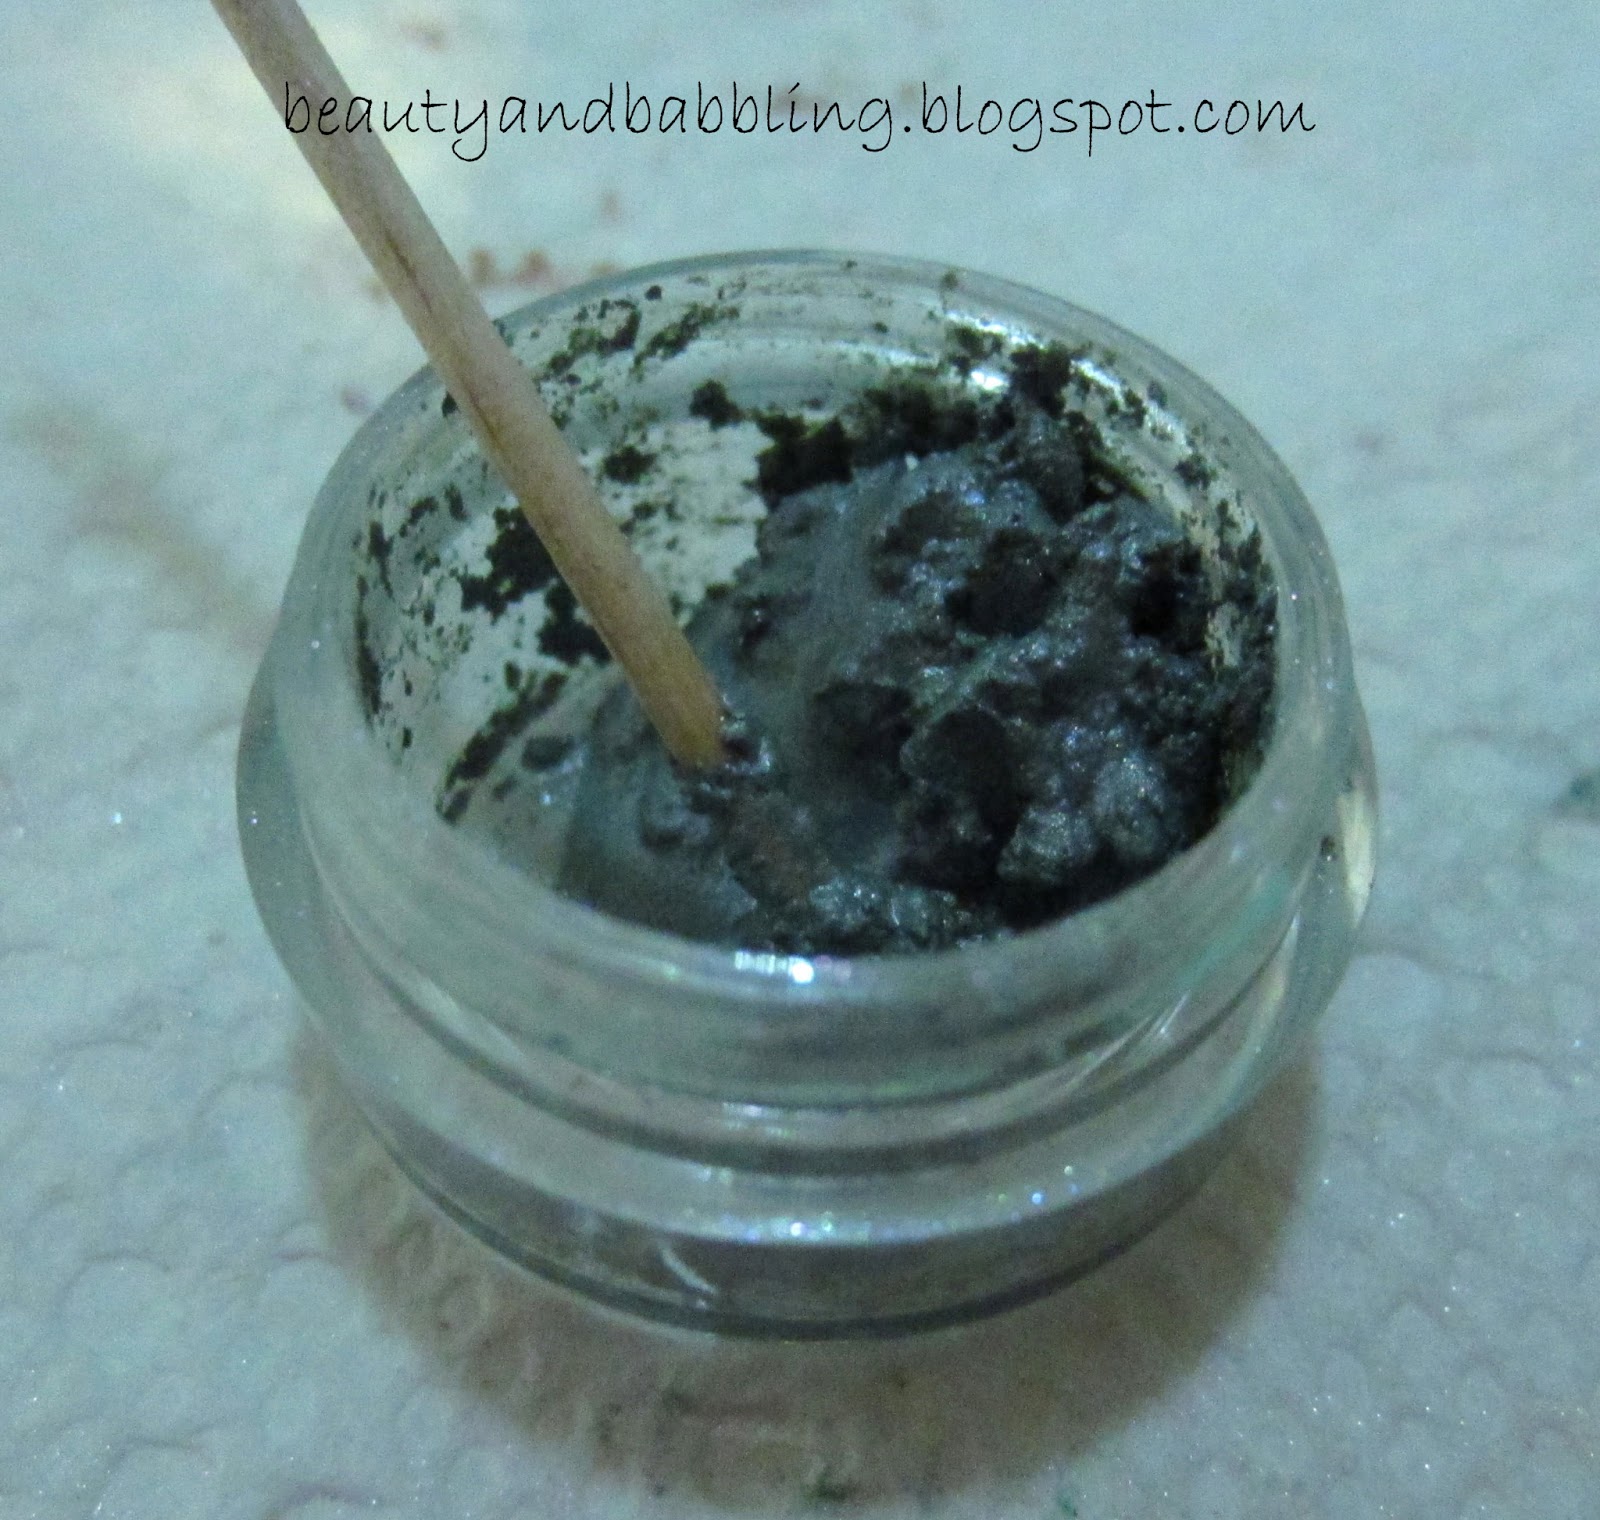
I usually give the shadow and MyMix a quick stir with a toothpick before I add the rubbing alcohol. I aim to add enough alcohol to the shadow to make it clump together and make it easier to pour into the shadow pan. I just add a little at a time and stir until I get the consistency I want. Thankfully, since the alcohol evaporates, even if you over-do it, it isn't going to actually hurt the shadow. You'll just have a harder time getting it out of the jar (you'll have to scrape more) and will have to press out more liquid.

Shadow in the pan before pressing

Pour the wet shadow into your pan and spread it out to fill the bottom. TKBTrading suggests pressing in 3 layers, but I don't normally bother with that. I haven't had any issues with not doing layers, but experiment and do what works for you.

Tamping tool over plastic wrap, paper towel, and shadow pan
Now it's actually time to press. Here I have a layer of paper towel and a layer of plastic wrap between the pan and the tamping tool. I don't think you actually need the saran wrap. I used it because TKBTrading's instructions said to wrap the tamping tool with saran wrap, but I realized that they also don't use the paper towel, so the tamping tool would come in direct contact with the shadow.

The paper towel is there to absorb some of the alcohol as you press. I usually move the paper towel and use the paper towel 2-3 times for each pan to get out as much alcohol as possible and get the shadow pressed down as much as I can.

Labeled shadow
 At this point, your shadow is pretty much done. It might need to dry a little bit longer, but since most of the alcohol is pressed out, it doesn't take long. I make sure to label all of my shadows because I want to know what they are later.

Finished shadow in a palette
That's it! Your newly pressed shadow is done and in its new home. Since I use tin pans, they automatically stick into magnetized palettes like this one.

Palette full of self-pressed shadows

Just for a quick recap/reminder, aside from accidentally dumping your shadow, the only way I know of to really screw up this process beyond repair is to add too much MyMix (or whatever mixing medium you choose). Use less to start. You can always break the shadow apart, add more, and repress it if you need to.

Let me know if you try pressing your own shadows! It's a relatively easy and fun process. I love how much space it saves me and how it's a lot easier to see what shadows I have.

 Disclaimer: There is nothing to report.

Wednesday, May 29, 2013

Deal Alert at Pacifica!

Disclaimer: I will be using a referral link in this post that will earn me a $10 credit if you create an account and place an order through my link. You will also earn a $10 credit when your first order ships. Beyond that, I am not sponsored by the company in any way.

I don't know about all of you, but I get tons of emails from beauty companies advertising sales, new products, etc...it's one of the hazards of being a beauty product junkie.

Yesterday, I got an email from Ipsy (formerly MyGlam). I haven't been subscribed to this service in over a year (and was only subscribed for three bags). I still get emails though and sometimes debate signing back up. Well...yesterday's email included their beauty deals for this month's bag. Inside were several coupon codes for different brands, including a 20% off code for Pacifica (referral link). The code is Beauty20. 

If you aren't familiar with the brand, Pacifica, it's a brand that primarily sells perfumes in spray, rollerball, and solid forms. They also sell some bath and body products and have recently branched out into cosmetics and skincare.

I haven't tried much from the brand myself, but I was always tempted by them when they were carried by Sephora. I picked up their Island Vanilla Take Me There set once, which included a rollerball perfume, a body butter, and a Color Quench Natural Moisture Lip Tint. I like the perfume and the body butter. I like the scent/taste and feel of the lip tint, but the color made me look dead because it was too milky for my pale skin.

With the 20% off code, I figured I would go play with a cart. I wasn't planning on actually buying anything because I've been on a shopping binge recently. When I got to the site, I saw that you can get a free gift if you sign up for their emails, so I signed up for their emails. The free gift is a Sugared Color Quench Lip Tint with a $25 purchase ($7 value).

I played with my cart, and I think I even got to the point of entering credit card information (it's a bad sign when I know my credit card number by heart and don't need to get the card), but I closed out the window and wandered off to make dinner.

When I returned to my computer and checked my email, I had another email from Pacifica offering me 10% off if I place my order (with a one-time use code). This no longer seems to be the case. I played with a new cart, and got a reminder email about checking out, but I didn't get a discount code.

At this point you are probably thinking, "What's the big deal? You can only use one code, right?" That's where you would be wrong. Pacifica accepts multiple codes! I was able to use all three to place an order!

Here was my order:

Quantity Product Unit Price Total Price
1 0057122 - Mediterranean Fig Solid Perfume - .1 oz Sample $2.00 $2.00
1 0030114 - Wanderlust Beauty Set $22.00 $22.00
1 0057127 - Tuscan Blood Orange Solid Perfume - .1 oz Sample $2.00 $2.00
1 0062622 - Color Quench Lip Tint - Sugared Fig $7.00 $7.00
1 0057104 - Mexican Cocoa Solid Perfume - .1 oz Sample $0.00 $0.00
Products Subtotal:  $33.00
IPSY you got 20% off your order!: -$4.54
Free Lip Quench with Purchase: -$7.00
10% Off for Completing Order: -$3.30
5-7 Day Ground Shipping: $5.95
Total: $24.11

Not bad, right?

I mentioned it in my disclaimer, but I'm going to explain it again. If you use my referral link, create an account, and place an order, I get a $10 credit to my account.  When you're first order ships, you also get a $10 credit (so it benefits you as well!). For reference, think of them as ExtraBucks from CVS, you have to pay out up front, but you get "money" to spend later.

So...I don't know if you could get the 10% code and still get the $10 credit for using a referral link, but they are both nice options.

I'm also going to point out that they have sample sizes of their solid perfumes. Their samples are .1 oz and sell for $2, and their full sizes are .33 oz and sell for $9. If you just order 5 samples, you can get them shipped to you for $2.95, bringing your total (before discounts) to $12.95. Not bad!

AND...this morning I got an email that they have 25% off Brook's favorites (I'm assuming Brook is the founder of the company). The discount codes should work on those items as well. I'm actually tempted to place another order.

Last piece of information - you can get free shipping with orders over $50, but that only counts after all of your discounts are applied. If you put $50 of product in your cart and apply discounts, you still have to pay shipping.

Okay...I think that's all the information I have. If you place an order, let me know what you got and how the discounts worked for you. Also please let me know if you used my referral link so I can thank you personally.

I hope this all makes sense, I typed this really quickly because I have to run out the door soon. I'll fix things later if it's needed.

Have you tried Pacifica products? What are your favorites? Will you be taking advantage of these deals?

  Disclaimer: I used a referral link in this post that will earn me a $10 credit if you create an account and place an order through my link. You will also earn a $10 credit when your first order ships.
Beyond that, I am not sponsored by the company in any way.

Monday, May 27, 2013

Pressing Mineral Eye Shadows - Part I

Disclaimer: This post is not being sponsored by anyone. I purchased all of the materials used myself. I will be including links where you can purchase items, but they are not affiliate links. 

Hi ladies!

If you haven't noticed, I'm having a giveaway right now that you can check out here! I have to say that I'm thrilled with the turnout I've had so far. I hope all of my new followers stick around even after the giveaway is over.

I went on a pressing spree over the weekend and took some pictures to share with you. I love mineral eye shadows. The colors can be so unique, and if you shop indie, the prices are phenomenal. However, having tons of little individual jars takes up a lot of room. That's where pressing has been a great space saver for me.

If you want to try pressing your eye shadows, here's what you'll need:

  1. Paper towels (and lots of them)
  2. Toothpicks (or some other small stirring tool)
  3. Pressing medium
  4. Rubbing alcohol (the higher percentage of alcohol the better)
  5. Loose mineral shadows
  6. Pans to press the shadow into
  7. Tamping tool and pressing tiles (not necessary, but they make things a lot easier)
  8. Labels for the bottom of pans (also optional)
  9. Someplace to put your pressed shadows (you can see a few different options here)


I ordered the special pressing items that I needed (like the pressing medium and pans) from TKBTrading because their prices seem to be the best. I got the 2 oz bottle of the MyMix Press-It Binder, which is huge. Unless you have a ton of shadows to press, stick with the 1/2 oz bottle. I think I was able to press around 100 shadows with the 1/2 oz size. Another benefit of the smaller size is that it comes in a dropper bottle. I had to decant my MyMix into a smaller bottle that I had on hand (the second bottle from the left - it looks yellow because there is a old label on the back). The third picture is another dropper bottle that I decanted my rubbing alcohol into. I like the dropper bottles because they make it a lot easier to control the amount of liquid coming out.

Left to right: 15mm pans, 36mm pans, 52mm square pans

This is a look at the pan sizes that I have. For reference, I purchased the 15 mm size for my stash of Silk Naturals gift with purchase shades that come in 3g jars. Darling Girl petite sizes also fit in this pan size. The 36mm size is what I would consider the standard size. They are the size of Mac shadows. I use these for pressing 5g jars of shadow, which is the standard size for full size mineral eye shadows. The 52mm square pans were purchased to press some Everyday Minerals blushes that come in 20g jars. They are huge and aren't necessary for most projects.

Note: Nearly all of the pans that TKB sells are tin (there's one set that has aluminum pans), which means that they will stick to a palette with a magnetic base (like a Z Palette); aluminum pans will not. Tin pans are also sturdier than aluminum. If you order from someplace else, you might want to pay attention to the material of the pans. The benefit of aluminum pans is that they don't rust, and tin pans can if you aren't careful.

Pictured directly above the pans are the pressing tiles. The pressing tiles are pieces of acrylic that are cut to fit perfectly inside the pans. The ones in the picture above still have the brown paper covering they come with. TKB recommends removing the paper before you begin pressing, but I find it hard to get off, and I don't think it affects the process, so it stays on until it decides to peel off on its own. For the larger pan sizes, I didn't feel the need to use the pressing tiles. The tamping tool works well on its own. For the 15mm pans, using the pressing tile and just my finger for pressure felt the most stable for the initial pressing.

The tamping tools are at the top of the picture. They are essentially a pressing tile glued to a handle. As I just mentioned above, for the larger pans, I just used the tamping tools to do my pressing. Basically, use whichever method you feel more comfortable with.

TKB sells "press packs" that include a tamping tool, two pressing tiles, and 9 tin pans in a variety of sizes all for around $3-$4 dollars. I'm going to link you to their page that includes all of their pressing supplies here. If you scroll down, the press packs are some of the last items listed.

I'm also going to draw your attention to their Press Your Own Makeup: Beginner Kit. This is what I originally purchased when I wanted to see if I liked pressing my mineral shadows. It costs $14.95 (shipping for just this kit is $3.50) and comes with:
  • Two 4-well magnetic palette made of eco-friendly cardboard yet with good, durable finish (pick from nine colors!)
  • Eight 26mm round tins which fit inside the palettes
  • One Tamper Tool and one press tile for pressing your powders
  • 1/2 fl oz TKB PressIt Binder with preservative added
  • Pressing Ribbon
  • 8 zip lock baggies
  • TKB MyMix Press Base (this is intended for if you are making your own shadows, not just pressing them)
  • 2 scoops and 1 spatula
  • Pair of latex gloves
It gives you everything you need to try out pressing without being a huge commitment.Once you decide whether pressing will work for you, you can buy in larger amounts.

Stay tuned for Part II where I'll walk you through the steps for pressing.

Have you pressed any of your mineral eye shadows or blushes?

Disclaimer: This post is not being sponsored by anyone. I purchased all of the materials used myself. I have included links where you can purchase items, but they are not affiliate links.